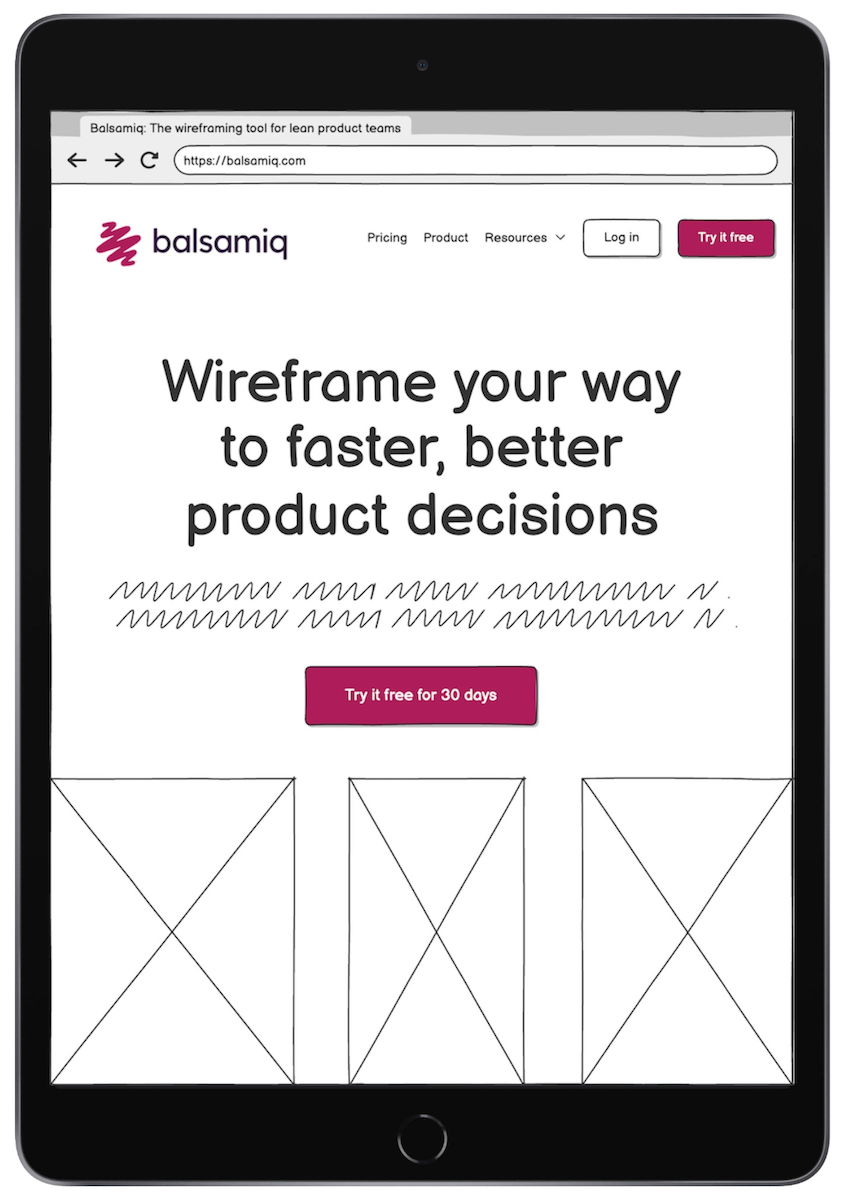
When you're designing wireframes using Balsamiq you don't need to sweat the details, but some of the details become more important when you start testing your wireframes. On an iPad, in particular, the wireframes have a much more immersive feel when they fit the viewport exactly, like in the example below.
This tutorial will help you ensure that your iPad wireframes are designed so that they fit nicely on an iPad when exported as images or a PDF.
Step 1 - Add the iPad element
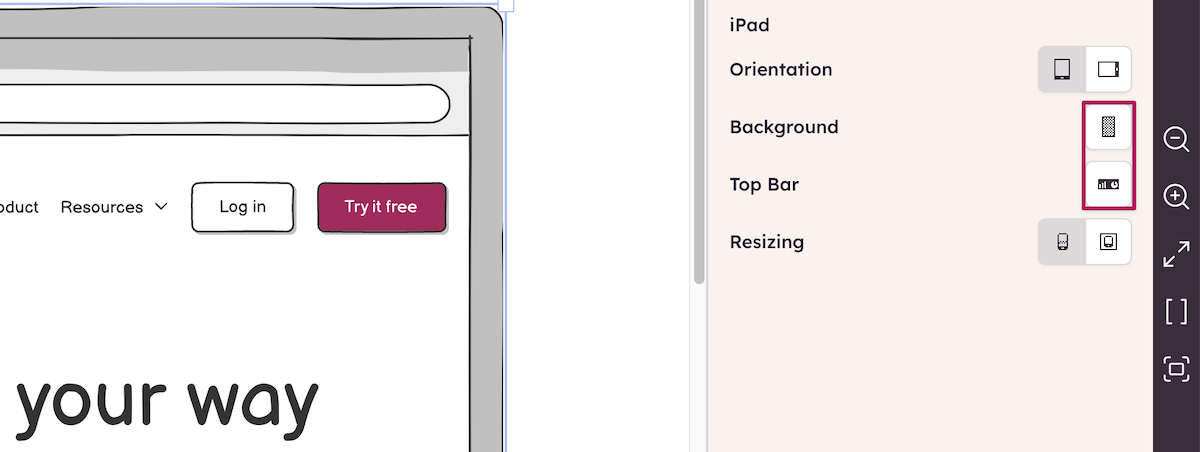
First, add an iPad element to the board. Click on the iPad element to bring up the selection toolbar. Exporting to the right dimensions works best with the Top Bar off, so turn it off in the selection toolbar. In the examples below we'll also turn the transparent background on, but you can leave it white if you prefer.
This tutorial also assumes that you haven't resized the iPad element, so try to leave it as the default size (or you'll have to do some math in step 2!).
Next, click the lock icon in the toolbar or from the right-click menu to lock the element into place. This step isn't necessary, but it makes it easier to keep it in place when adding other elements on top of it.
Step 2 - Add a rectangle element
Now that we've added the iPad element, we want to make sure that what we put inside it is going to get exported in the same proportions as an actual iPad screen (not the same dimensions, but the same aspect ratio, which is 4:3 for the iPad).
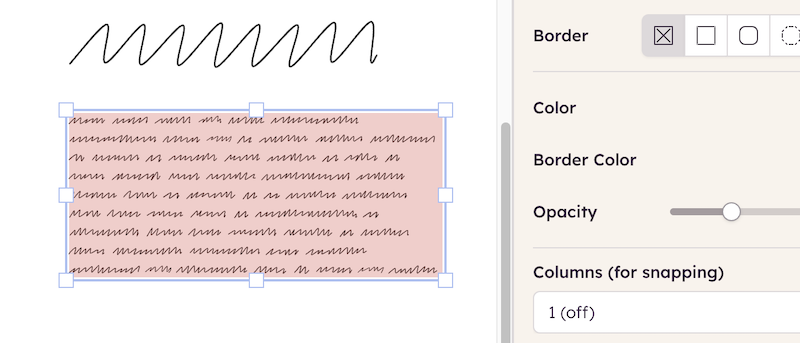
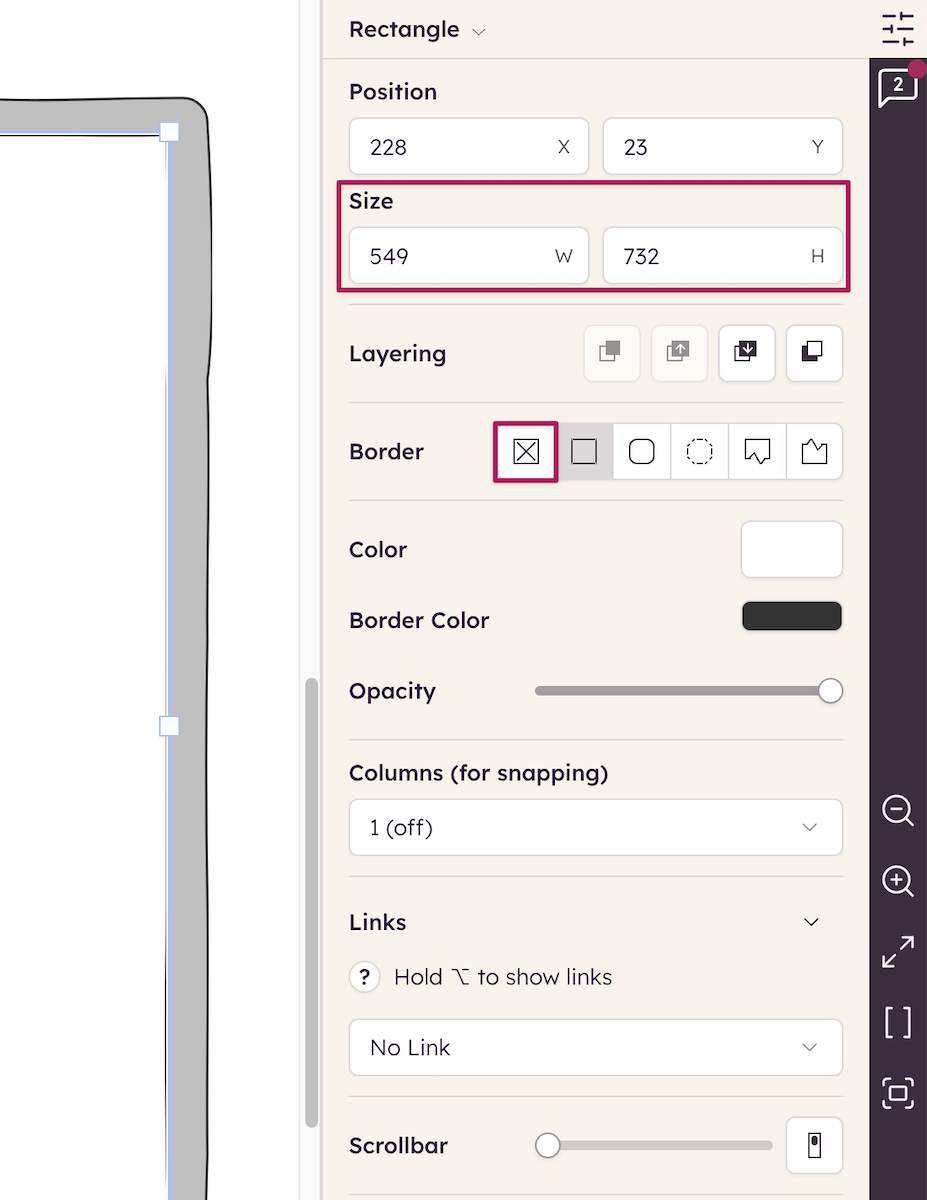
To do this, add a Rectangle element to the board. Now, select it and set the following properties in the Property Inspector:
- Set the Size to 549x732 (you can click inside the box to edit the numbers)
- Set the Border Style to No Border (the first option)
These settings are highlighted below:
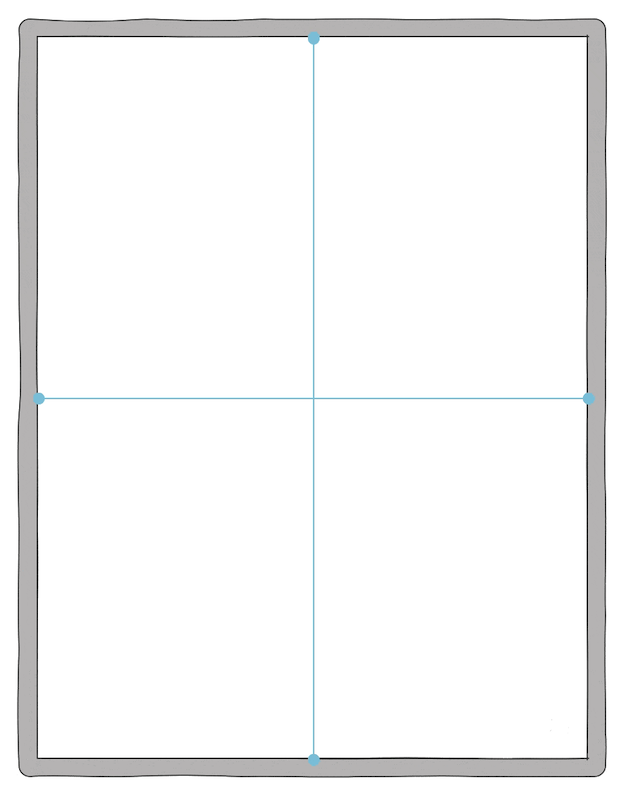
Next, move the rectangle over the iPad until both the vertical and horizontal center alignment guides appear over the iPad, like the image below. This will ensure that it is lined up with the iPad viewport.
Finally, click on the rectangle and lock it, just as we did with the iPad element. This will prevent it from moving around when you're adding new elements. You shouldn't be able to select either element at this point (you can always unlock a element by right-clicking on it and selecting "Unlock").
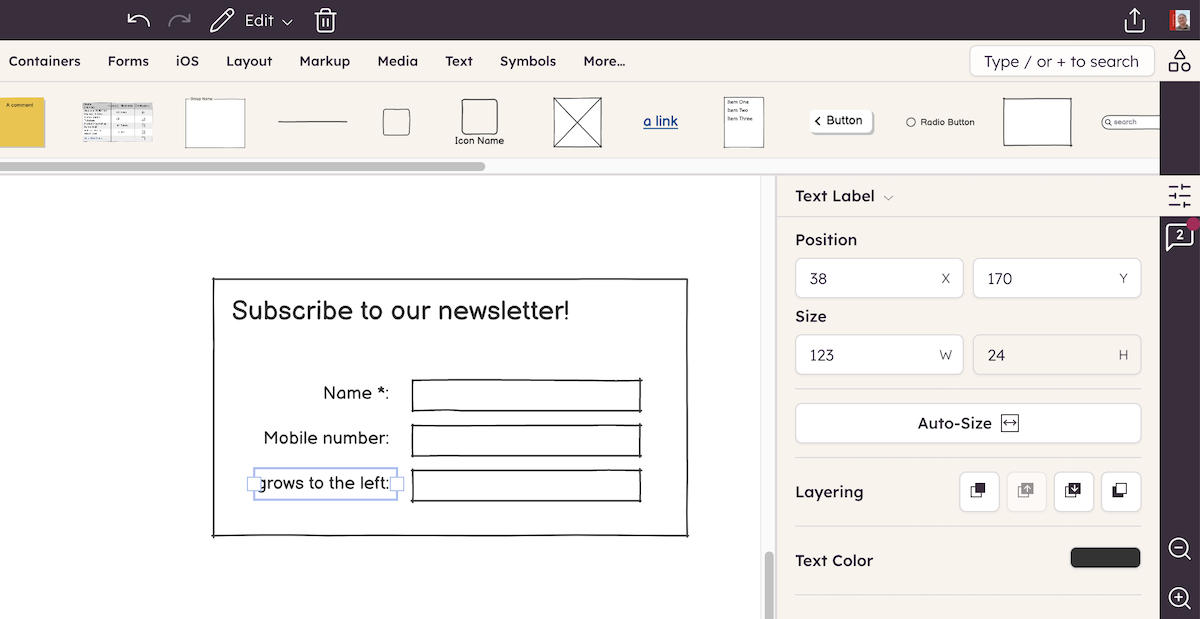
Step 3 - Create your wireframe
Now, the fun part. Create your wireframe, making sure that all of your UI elements fit inside the viewport/window of the iPad device (the alignment guides at the edges should help with this).
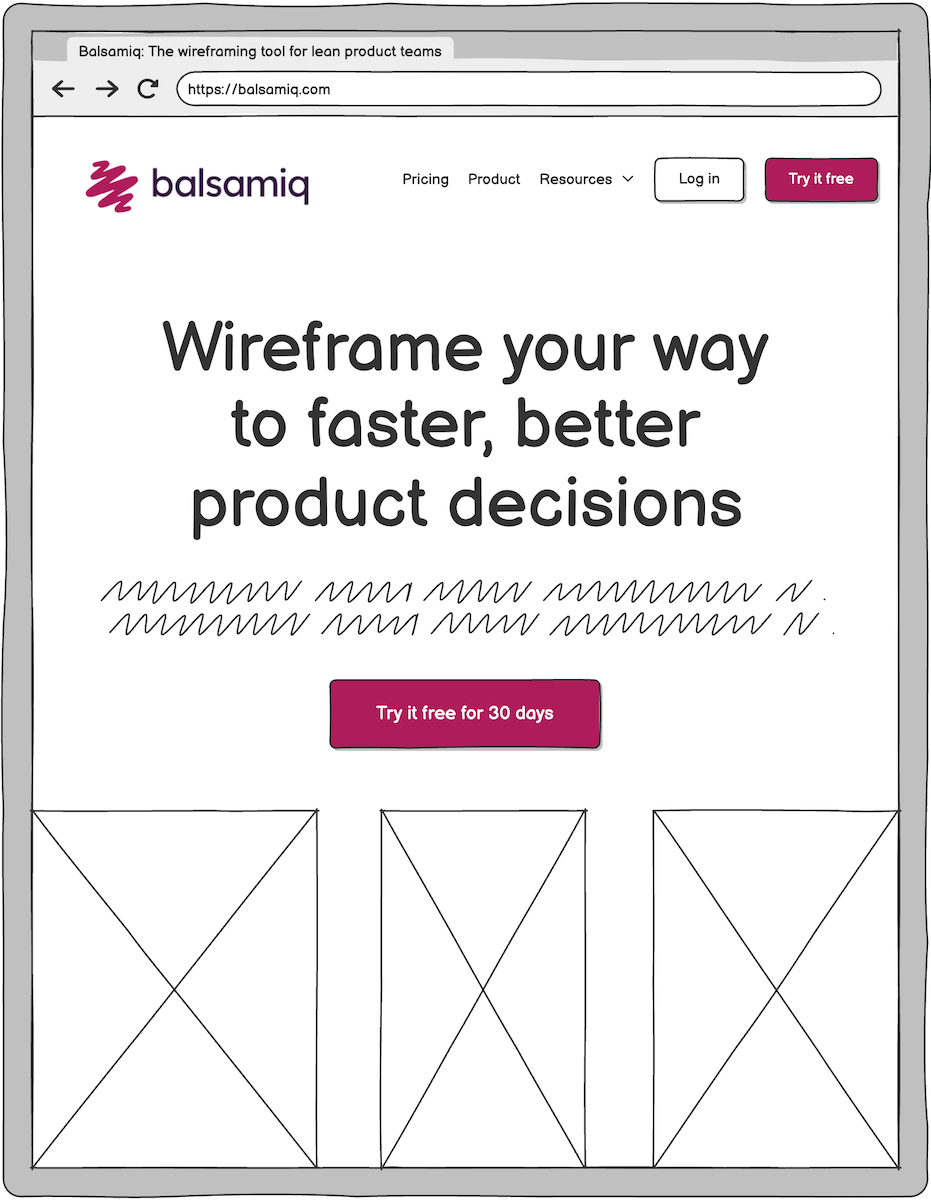
Here's an example:
Step 4 - Export your wireframe
Now that the wireframe is done, you're almost ready to export. Since you don't want to view the iPad device element inside the iPad itself, we need to get rid of the iPad device in Balsamiq. Select the iPad element and delete it from the wireframe.
Now, export your wireframe as an image or PDF via the File menu.
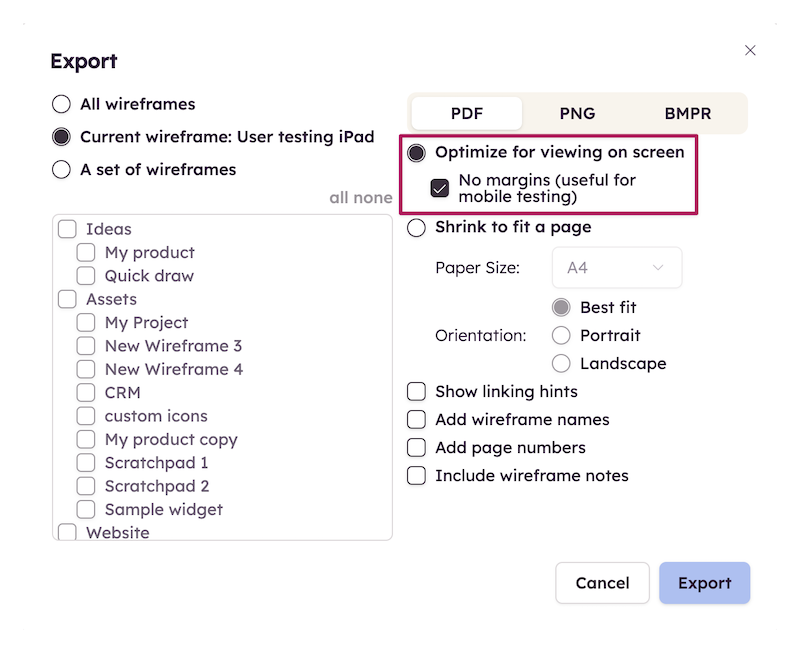
If you are exporting as PDF make sure that any other wireframes you have open are also iPad wireframes and have been treated similarly (so that all the PDF pages will be the same size). Also, set the Export Options to "Optimize for viewing" with no margins, as shown below.
Step 5 - Send to your iPad
You can transfer your exported wireframes to your iPad via email, Dropbox, or a variety of other methods. There are also several applications that you can use to view them on your iPad (these will usually be listed in the "Open in..." menu when you have the image or PDF selected).
We've found that the Apple Photos application works well for viewing wireframes saved as images and the Apple Books application (free in the App Store) works well for viewing wireframes saved as PDFs. The rectangle element we added in step 2 should ensure that your wireframes are sized correctly in either of these applications.
If you've exported a wireframe with links to a PDF the link targets should work, allowing you to interact with your wireframes like a real product. This is great for user testing or informal review while the design is in progress!